✅ Daily Trader Checklist
“I am the #1 Trader — I Execute with Clarity and Discipline”
🔁 HABITS
- Chart prep: mark OBs, liquidity, bias
- Write down your trading plan
- Journal each trade
- Review yesterday's trades
- Study 1 concept
- Visualize perfect trade (5 mins)
🧠 MINDSET
- Affirmation: "I follow my edge. I trust my process."
- Accept losses as feedback
- No chasing price or profit
- Focus on execution, not result
🎯 FOCUS
- Stick to ONE strategy
- Avoid useless news/alerts
- No random timeframe switching
- Follow only trusted sources
🏠 ENVIRONMENT
- Clean desk with only trading tools
- Sticky note: "Wait for your setup"
- No phone or multitasking
- Review last 5 trades pre-market
⭐ END OF DAY REFLECTION
- Did I follow my plan?
- What did I learn today?
- What can I improve tomorrow?
- POC is where the highest volume of trades took place, it also acts as Support or Resistance.
- HVN is where the highest trading activity, cluster of volume, acts as Support or Resistance.
- LVN is where the lowest volume activity took place.
- HVN + POC is at the top of the profile means up-trend is strong.
- HVN is at top and POC is at the center of the profile means it will take longer time to break HVN.
- POC is at the center of the profile means sideways trend.
- Start from "left to right" only in both trend
Indian Market Best Time Frame and Trading Hours
- Analysis Time Frame
- 1hr, 15mins
- Entry Time Frame
- 5mins, 15mins
- Best Trading Hours
- 9:20 AM to 11:30 AM
- 1:45 PM to 2:45 PM
Forex Market Best Time Frame and Trading Hours
- Analysis Time Frame
- 1hr, 4hr
- Entry Time Frame
- 5mins, 15mins
- Best Trading Hours (IST)
- 12:30 PM london session opening
- 7:00 PM NewYork session opening
Crypto Market Best Time Frame and Trading Hours
- Analysis Time Frame
- 1hr, 4hr
- Entry Time Frame
- 5mins, 15mins
- Best Trading Hours (IST)
- 1:30 PM – 4:30 PM London Session
- 6:00 PM – 2:00 AM NewYork Session
Genuine pullback Fibonacci Retracement levels, 38%, 61%, 78%(risky)
📈 Volume Behavior and Market Context
| Trend / Context | Node Type | Volume Behavior | Signal / Interpretation |
|---|---|---|---|
| 🔼 Uptrend | HVN | Break with high volume | ✅ Genuine bullish breakout → trend continuation |
| Break with low volume | ❌ Weak breakout → likely fake → watch for rejection or return to balance | ||
| LVN | Break upward with volume spike | 🚀 Fast move to next HVN/resistance → price skipping low-value zones | |
| Rejection + volume spike | 🛑 Supply hit → temporary pullback or pause | ||
| POC (pullback HL → HH) | Break with high selling volume | ❗ Change of control → sellers dominate → price may drop to next support | |
| Break with low or decreasing volume | 🔄 Buyers still in control → price may bounce from HVN or demand zone (OB) | ||
| 🔽 Downtrend | HVN | Break with low volume | ❌ Trap breakout → likely reversal or resistance holds |
| Rejection + volume spike | ✅ Confirmed resistance → downtrend continuation | ||
| LVN | Break with high volume | ✅ Strong continuation lower → price seeks next support zone | |
| Break with low volume | ⚠️ Weak attempt → price may stall, trap, or reverse | ||
| POC (pullback LH → LL) | Break with high buying volume | ❗ Change of control → buyers dominate → deeper pullback or reversal likely | |
| Break with low or decreasing volume | 🔄 Sellers still in control → price may reject and continue down from HVN or OB |
📊 Visualizing the Topic of FVP
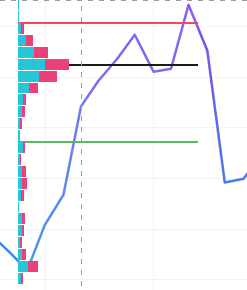
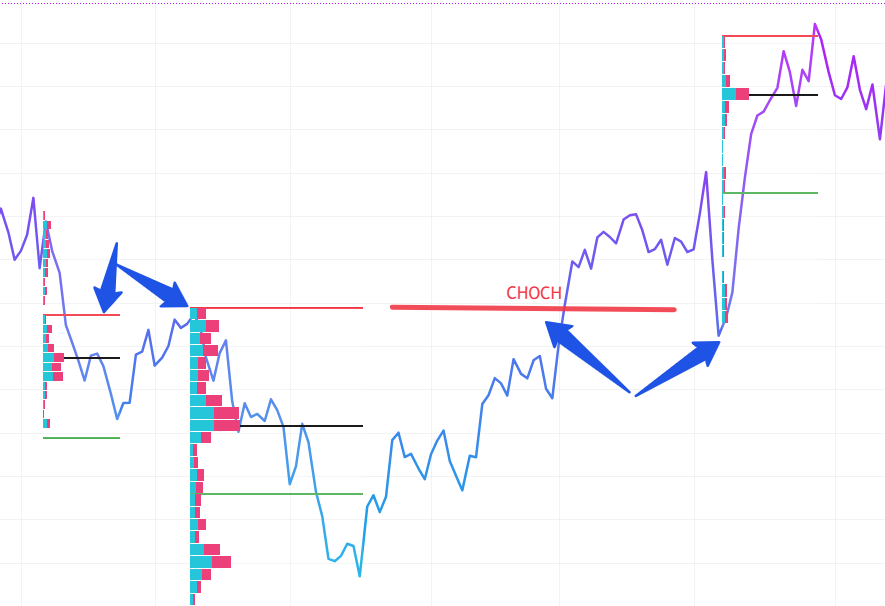
Bullish FVP
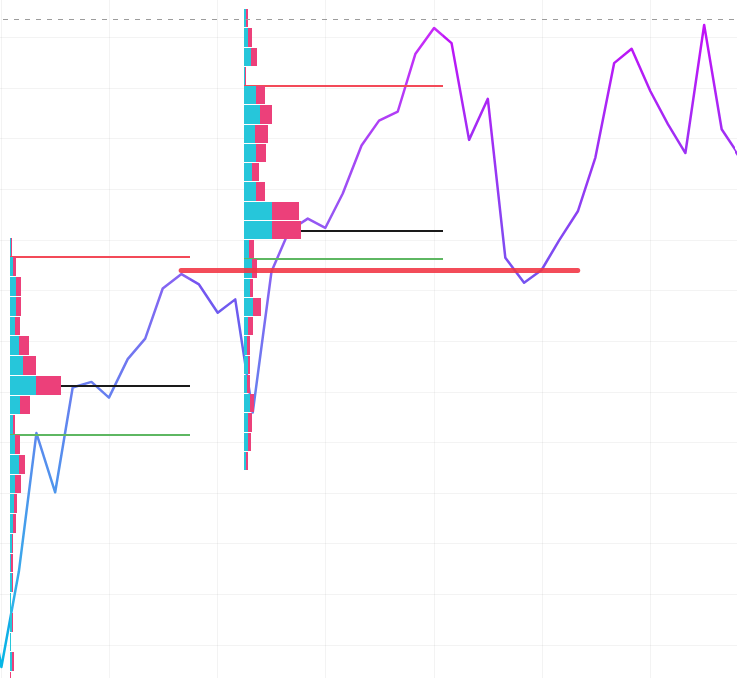
HVN => Support

Bearish FVP
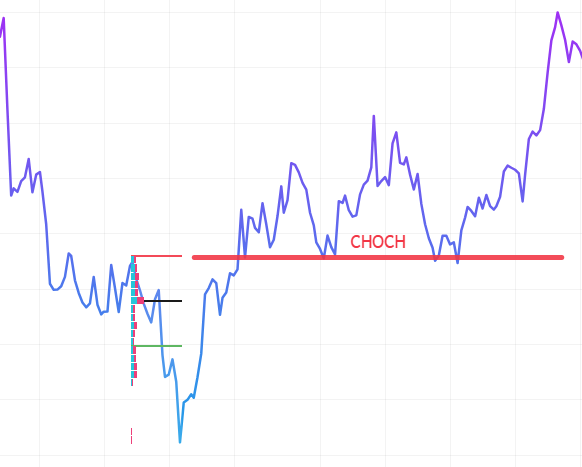
CHOCH => Support FVP
Overall FVP

Up-trend "Order Block", visaversa for Down-trend